The Light Editor
Some sites open the project in a lighter editor: no bars, no control bar, three floating islands over the plan and nothing else until something is selected. What it shows exists in the full editor too; this page says where each part went.
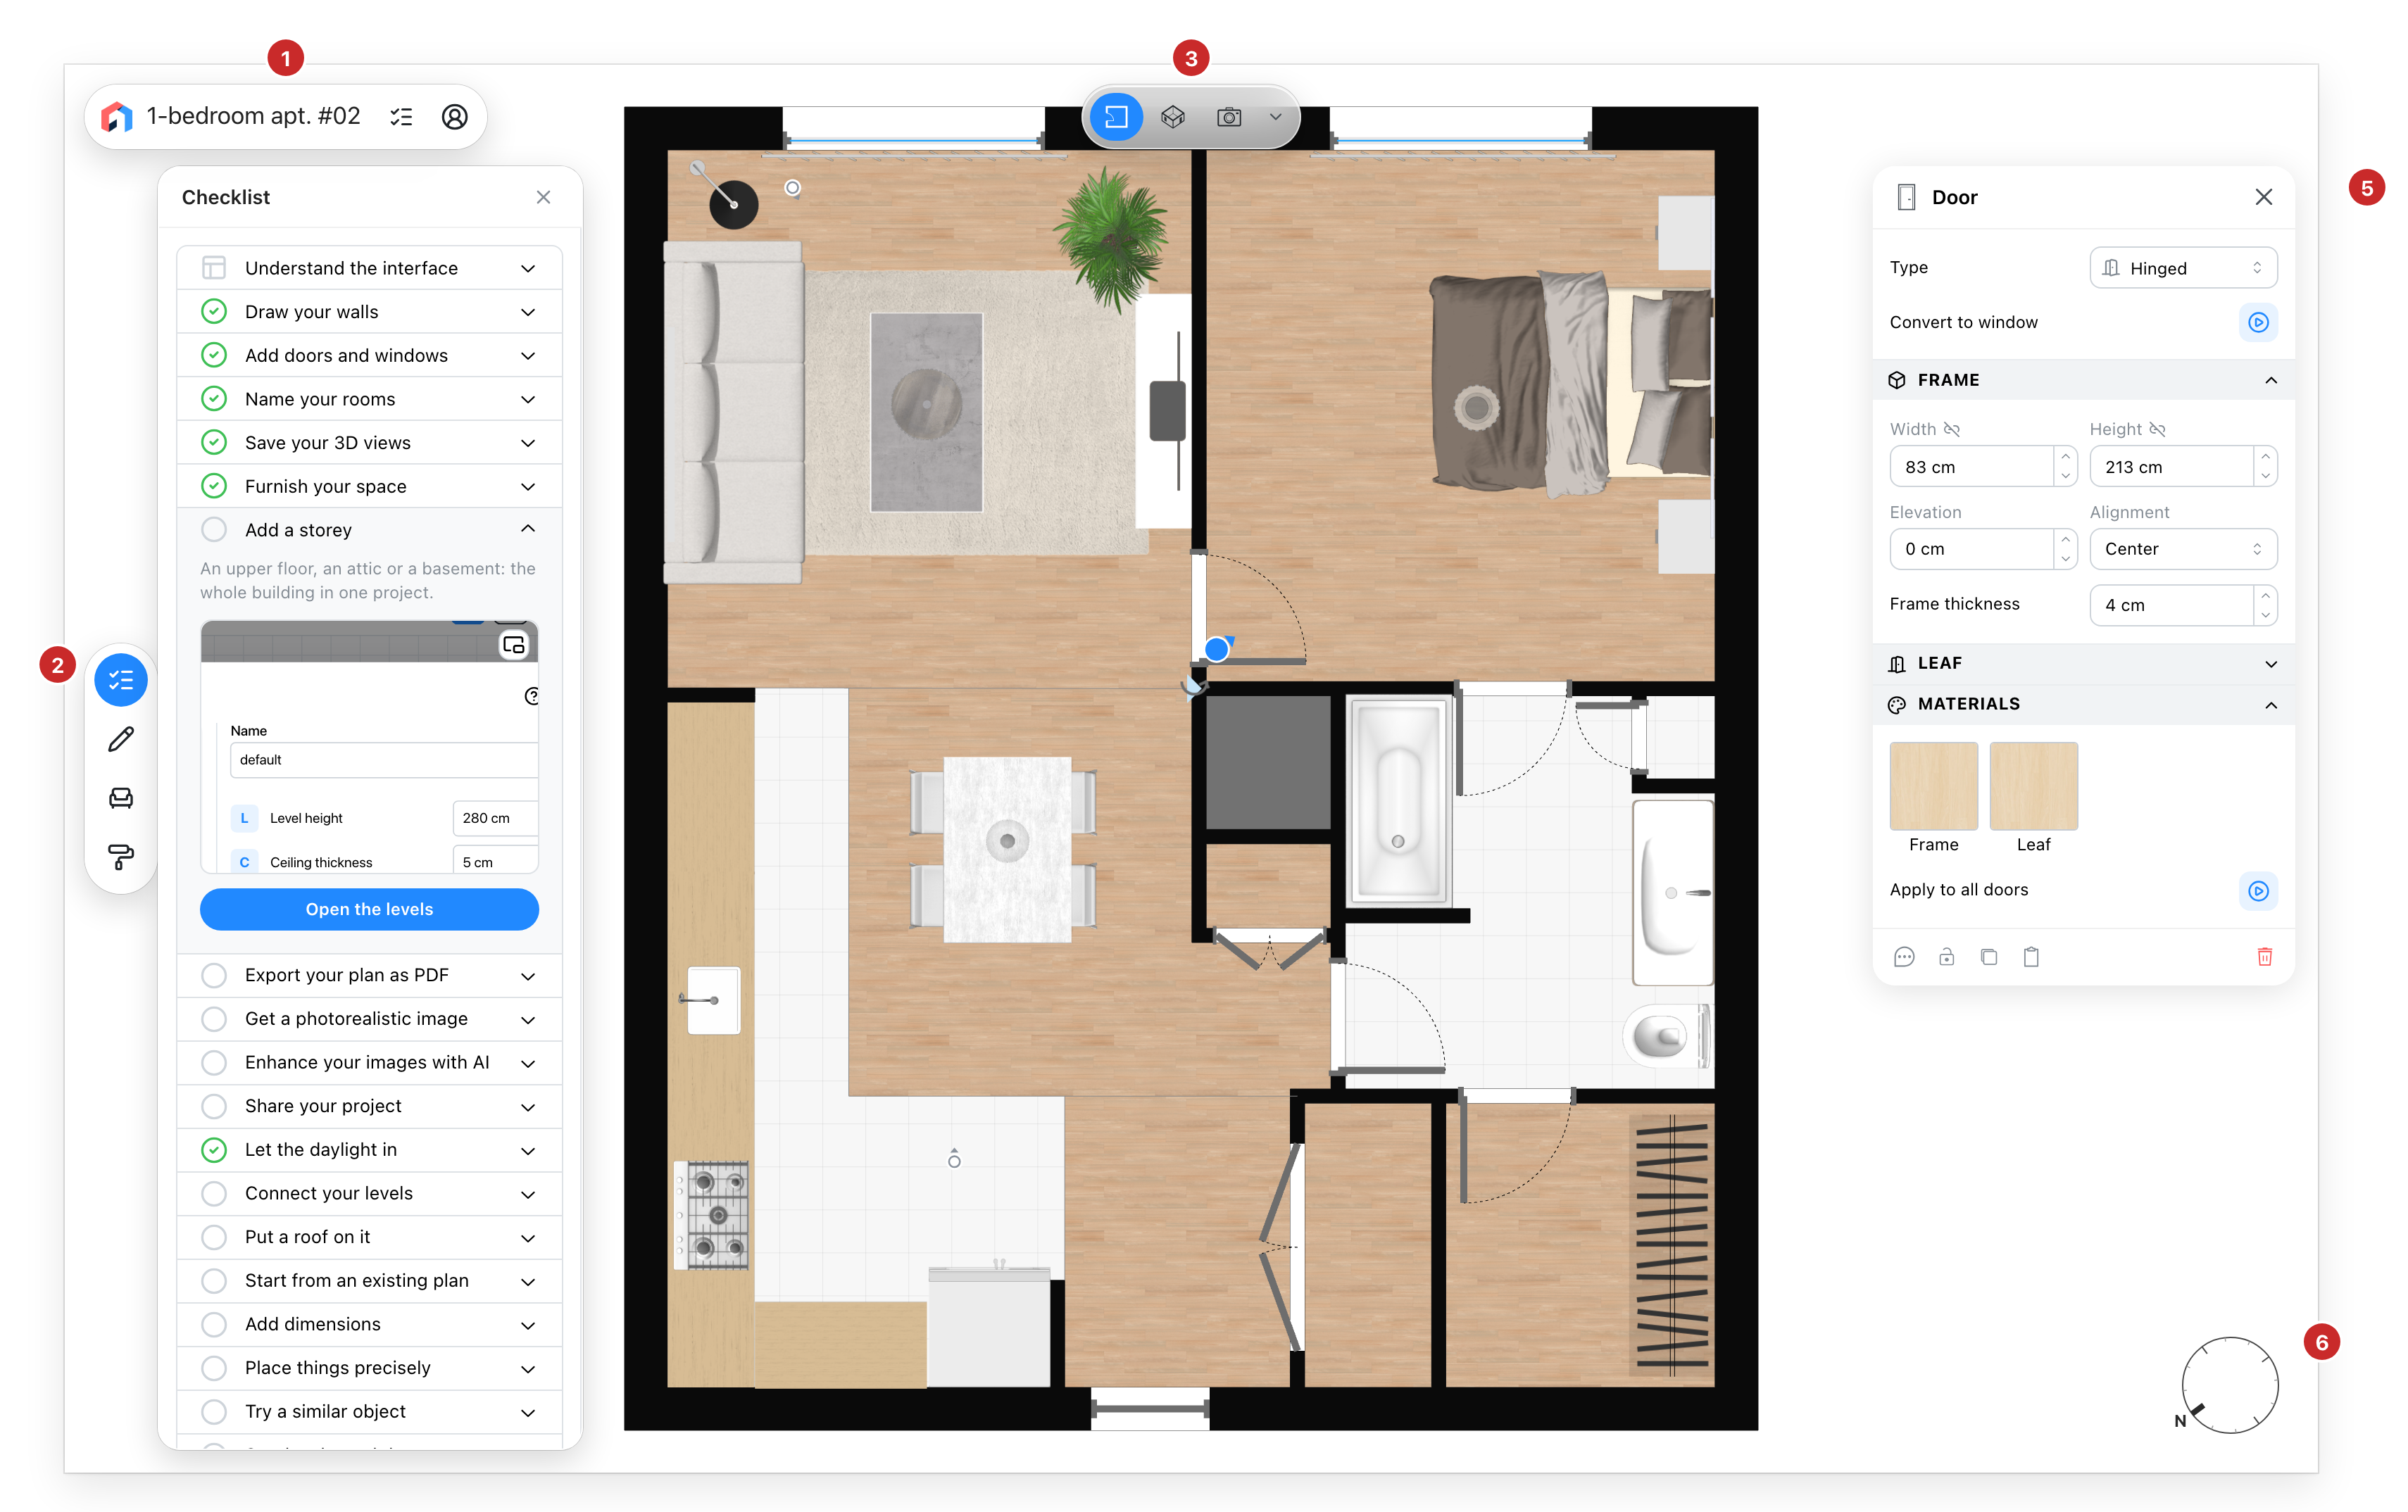
- The title island. The site's mark, the project's name, the summary, and the menu of your account: save, your projects, your account and log out, or log in.
- The rail. A short column of buttons. The checklist comes first on sites that have it, then the pencil of the drawing tools, then the catalogue and the materials. The pencil opens four tools that draw on the plan: Wall, Outdoor Space, Dimension and Note. A button the current view does not draw takes you to a view that does; in 3D Immersive those buttons are greyed.
- The views island. The ways of looking at the project, and the chevron that lists the levels and the sections, as in the full editor.
- The navigation pad. Zoom and pan, and behind its caret the camera's own actions.
- The property panel. Opens for whatever is selected, with everything that thing carries.
- The compass. North on the plan; in 3D, the sun.
Sheets instead of tabs
The checklist, the catalogue and the materials open in a sheet beside the rail, with its title and a cross to close it. The backgrounds have no button: their sheet opens when you select a background on the plan. Close the sheet and the plan is alone again. On sites where the checklist is the default tab, the editor opens with its sheet open, as the full editor does.
See also
- The Editor, the full frame these islands are taken from, and its checklist.
- Drawing Tools for what each tool draws.